Button Model Example
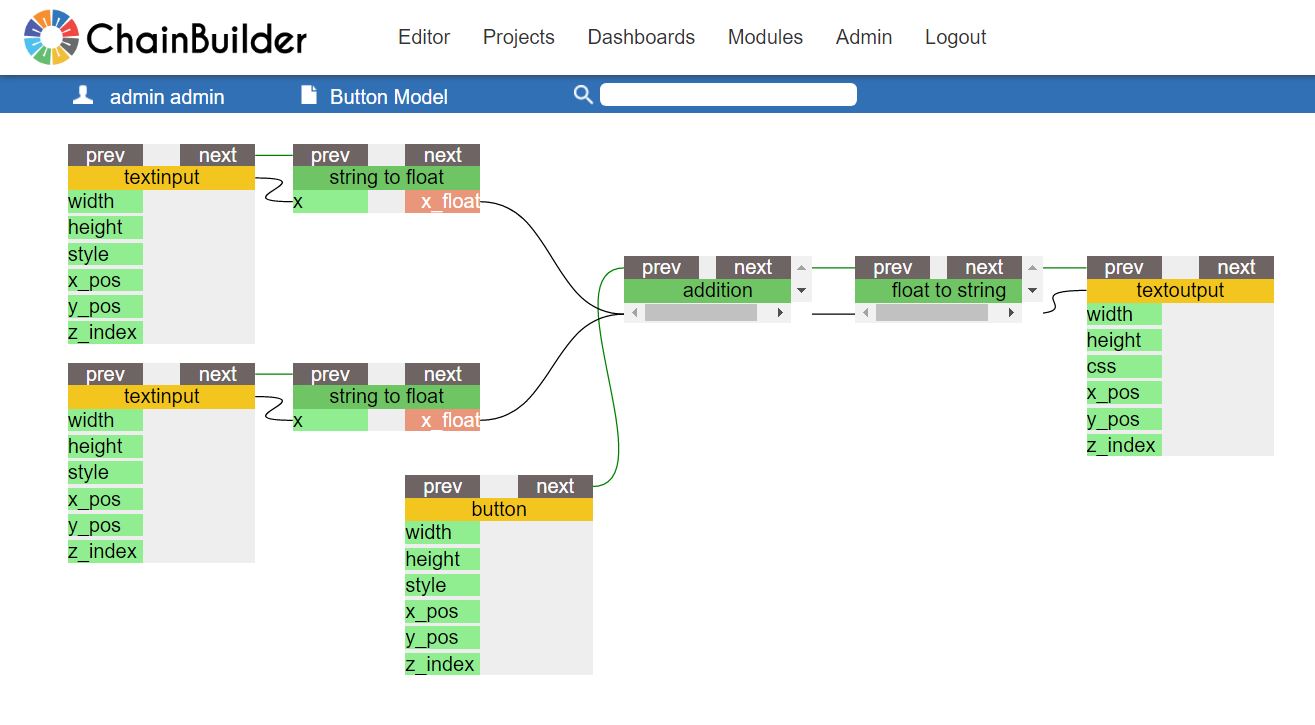
This tutorial is a step-by-step guide for building a two-input, button addition model. The goal of the tutorial is to use an example to teach you how to interrupt the connection between the inputs and the workflow with a button.
Step 1
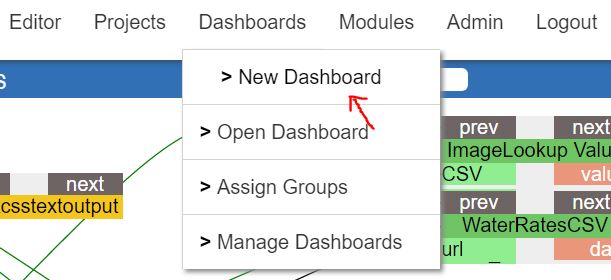
Create a New Dashboard.
Step 2
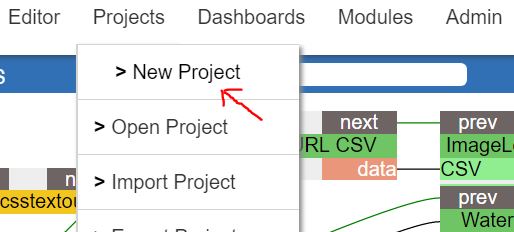
Create a New Project. Navigate to your Project Editor.
Step 3
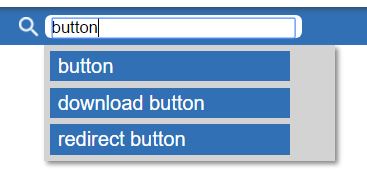
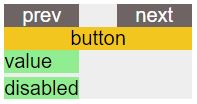
Search for the “button” widget. Drag-and-drop to add the button to your Editor.

Step 4
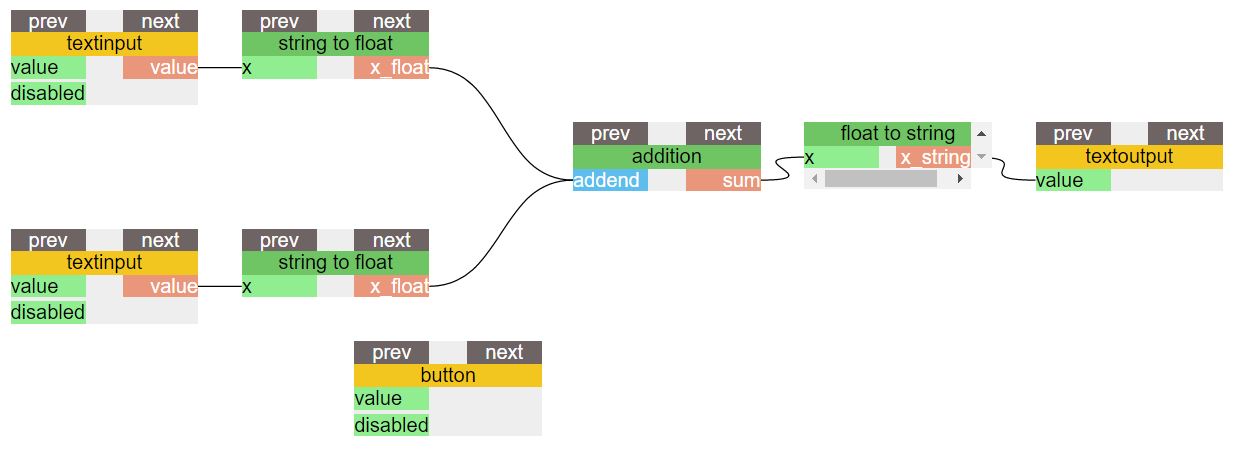
Add all the other widgets needed for your model to run with the same search, then drag-and-drop method:
- Input widgets: 2 “textinput” widgets, 2 “string to float” widgets
- Data processing widget: 1 “addition” widget
- Output widgets: 1 “float to string” widget, 1 “textoutput” widget

Step 5
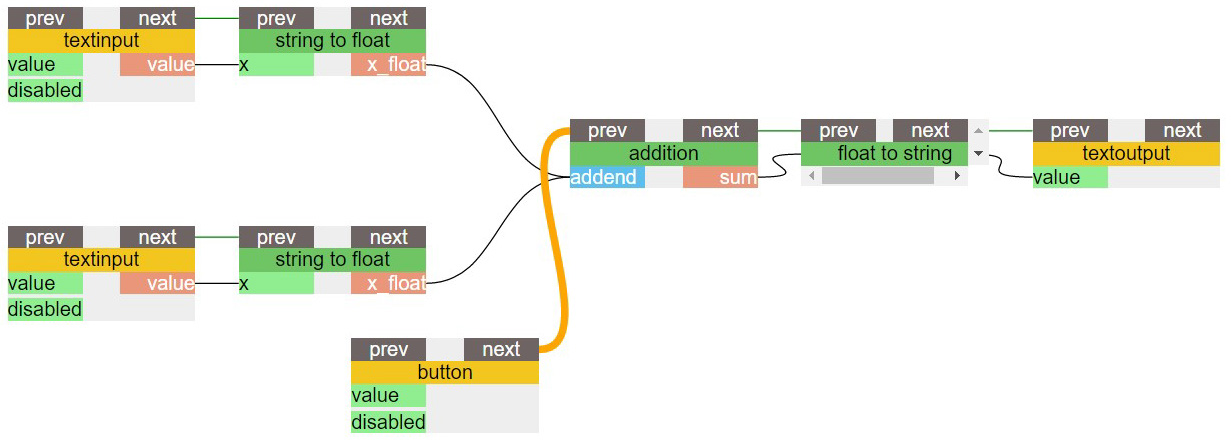
Create the data workflow for your model by connecting each of the widgets, except for the button using the (black) data workflow lines at the bottom of the widgets.
- Connect each of the textinput widget “value” handle to each of the string to float widget “x” handle.
- Connect each string to float widget “x float” handle to the addition widget “addend” handle.
- Connect the addition widget “sum” handle to the float to string widget “x” handle.
- Connect the float to string widget “x_string” handle to the textoutput “value” handle.
Step 6
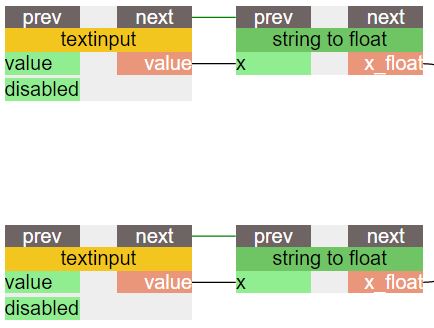
Create an (green) execution workflow that only connects the tops of widgets involved with model inputs.
- Connect each of the textinput widget “next” handle to each of the string to float widget “prev” handle.
Step 7
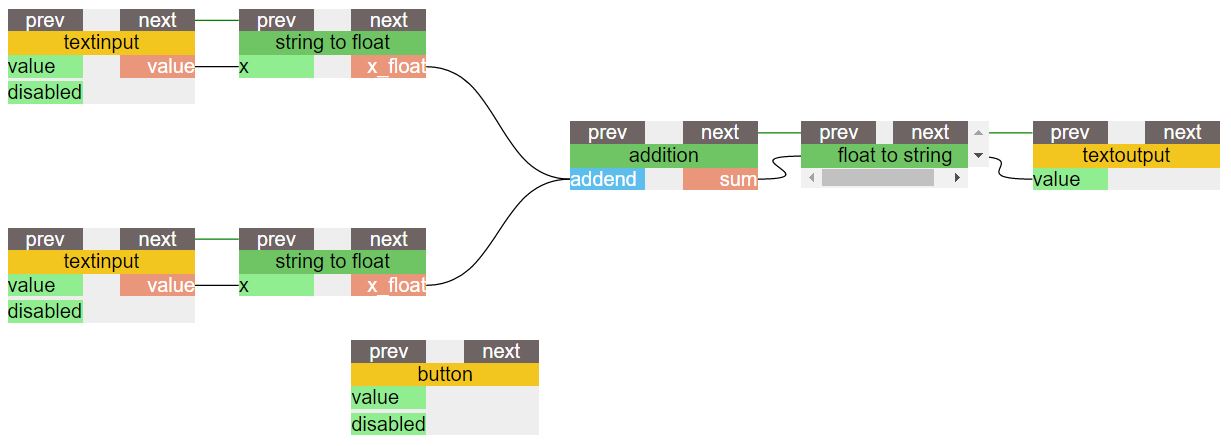
Create an (green) execution workflow that only connects the tops of widgets involved with the model processing and outputs.
- Connect the addition widget “next” handle to the float to string widget “prev” handle.
- Connect the float to string widget “next” handle to the textoutput “prev” handle.
Step 8
Connect the “next” handle of the button widget to the “prev” handle of the addition widget.
Step 9
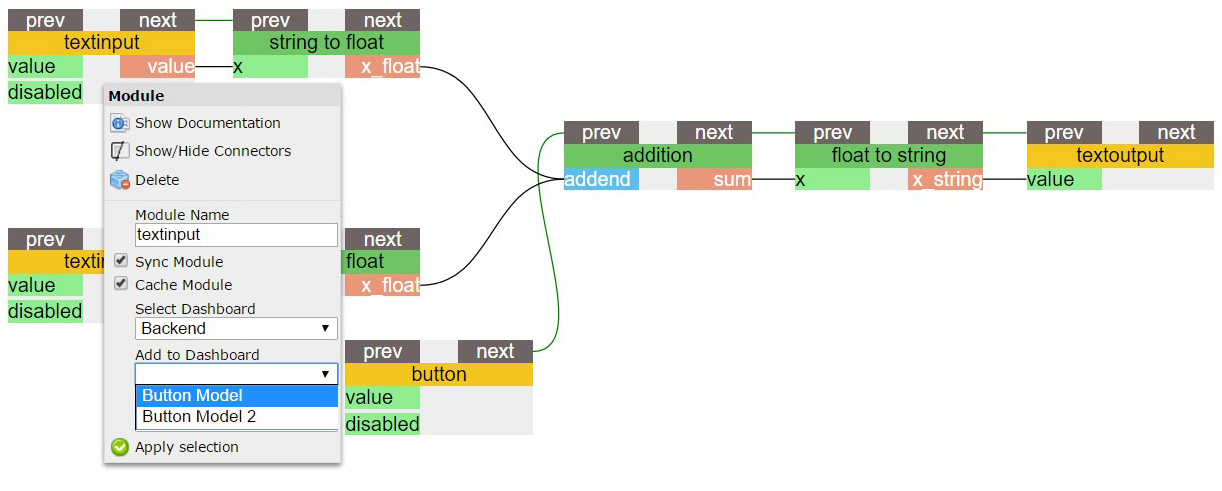
Add each of the yellow widgets (the textinput, button, and textoutput widgets) to the Dashboard you created earlier. To do this:
- Right click on each of the widgets.
- Select the correct dashboard under the “Add to Dashboard” dropdown.
- Click “Apply Selection.”
Step 10
Navigate to the Dashboard to use the button model. You may need to right-click, enter setup mode and move each of the model components before the model is usable. You may also complete other visual design steps within the Dashboard.
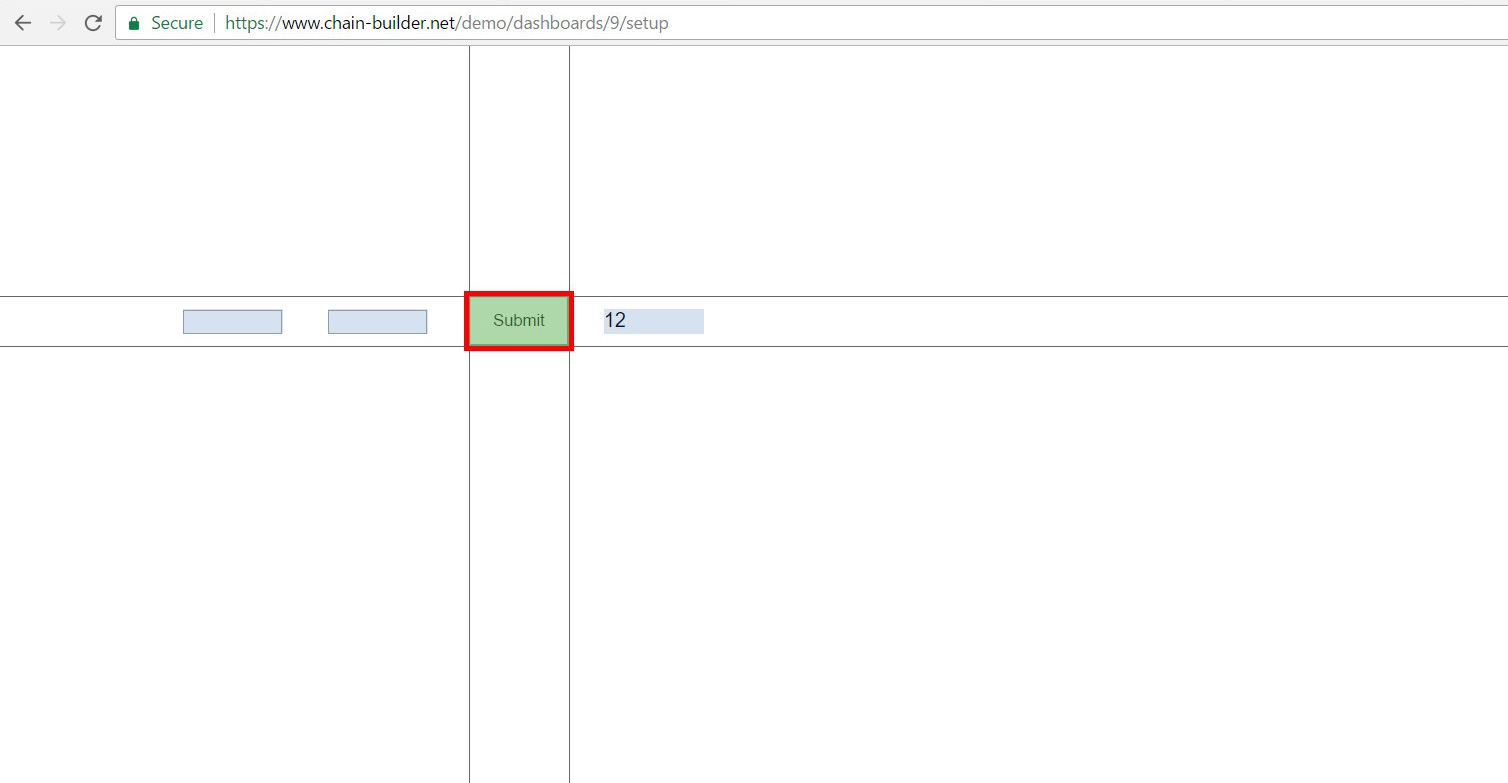
The Final Result:
You now have an additional model that runs on a button. You have two input boxes, a button, and an output box. Enter numerical values into the input boxes, press the button, and the model will calculate the sum in the output box. A finished version of the model described here is avaliable in the demo version of ChainBuilder at www.chain-builder.net/demo.
The Final Dashboard:

The Final Editor:
